
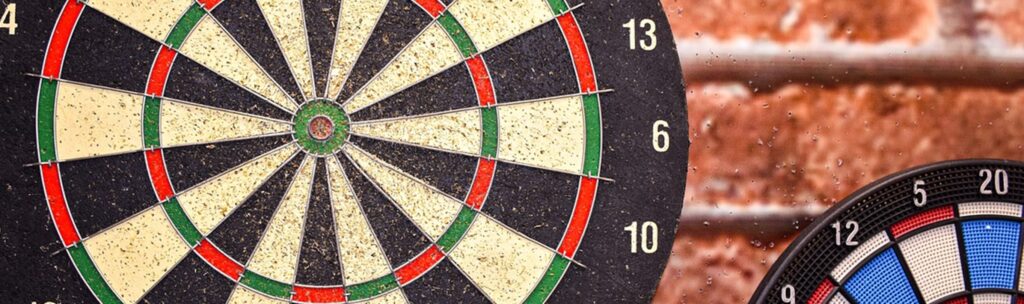
Hanging a dartboard on brick or concrete may seem like a bit of a challenge, but there are actually several ways to do it effectively. In this article, I’ll take you through four different ways to hang your dartboard on a brick or concrete walls, including methods involving nails and some that don’t involve any drilling at all.
The Quick Answer
The best method of hanging a dartboard on a concrete or brick wall is to use a U-shape bracket. This allows you to position the board most securely and rotate it to make it last longer. Alternative methods of hanging a dartboard without nails include using command strips, brick clips or board stands.
Option #1 Using a Bracket (Best Method)
Using a U-shaped wall bracket is the best way of hanging a dartboard on any type of wall, including brick and concrete. It ensures the dartboard is in the most secure position, and makes it easy for you to take it off the wall and rotate it. The only issue with this method is that it does require you to drill holes in the wall and use nails.
What You’ll Need:
- Viper by GLD Dartboard Mounting Hardware Kit (link to Amazon)
- Screw for your dartboard (most come included)
- Red wall plugs
- Hammer
- Cordless drill
- Masonry drill bit
Instructions:
1. Attach the bracket to wall
- Make a mark on the wall 5’8″ (1.73 m) from the ground.
- Position the U-shaped bracket on the wall with the bottom of the U positioned on the mark.
- Mark the two screw points where you will need to drill into to attach the bracket to the wall. Always drill into the brick rather than the mortar.
- Tape around the masonry drill bit to mark how far you need to go into the wall (this should be a few millimetres deeper than the nail you’re using).
- Drill the holes into the wall.
- Put your wall-plug into the holes you drilled into the wall and tap it in with a hammer.
- Screw the two nails into the wall to attach the bracket using the cordless drill.
Note: you can also drill a wooden panel into the wall and attach your bracket to this instead of the brick directly.
2. Hang the dartboard onto the bracket
- Attach the screw into the pre-drilled hole on the back of the dartboard (exactly in the center).
- Hook the dartboard on the bracket by aligning the screw with the “U” of the bracket.
- Rotate the dartboard so that the “20” is at the top.
- Make sure the dartboard doesn’t wobble. If it wobbles, the screw on the back of the board likely needs going in further. If the screw is in too deep, then there won’t be enough space for it to hook onto the bracket.
| Pros | Cons |
| Secure fitting | Requires more equipment |
| Allows you to rotate the board | Uses nails |
Option #2 Using a Brick Clip (No Nails Needed)
A brick clip is a good alternative to using a wall-bracket because it does not need to be screwed into the wall. This will allow you to hang your dartboard without using any nails which will permanently leave a mark in the brick. The drawback of this method are that it is not as secure as using a bracket.
What You’ll Need:
- Brick clip (link on Amazon) make sure you choose the correct size clip for the type of brick
- D-ring anchor (link on Amazon)
Instructions:
- Make a mark on the wall 5’8″ (1.73 m) from the ground.
- Install the brick clip onto the wall so that the hook is 1 1/4″ above the mark (this allows for the D-ring to hook onto the brick clip). Depending on your bricks, you may not be able to get your dartboard to hang at the regulation 5’8″ height.
- Attach the D-ring anchor onto the center of the back of dartboard making sure that the “20” will be at the top of the board.
- Hook the dartboard on the brick clip.
| Pros | Cons |
| No nails required | Not super secure |
| Inexpensive | Only suitable for exposed brick |
| Easy to fit | Cannot rotate the board without re-installing D-ring |
| No specialist equipment needed | Board may not be at exact regulation height |

Brick Clips (image links to Amazon)
Option #3 Using Command Strips (No Nails Needed)
Command strips work best on concrete walls as they have a flat surface, but can be used for brick walls as long as they are not very textured. The advantage of this method is that it allows you to attach a dartboard to your wall without using nails or drilling into the wall. However, it means you can’t rotate your board without re-installing the command strip every time, and the board will not be as secure compared to using a bracket.
What You’ll Need:
- Command Large Picture Hanging Strips (link to Amazon)
- Rubbing alcohol (link to Amazon)
Note: this is the best type of Command strips to use because it has a weight capacity of 16 pounds. Most dartboards weigh between 6-13 pounds for bristle boards, and 2-5 pounds for electronic boards without a cabinet.
Instructions:
- Clean the wall using the rubbing alcohol. Be careful on painted finishes as this may strip the paint. Use an alternative to clean the wall if necessary.
- Make a mark on the wall 5’8″ (1.73 m) from the ground. This is where the center of the board needs to be positioned. Make marks on the edges around the board before you attach it to the wall to make sure you can position it correctly.
- Click the command strips together.
- Remove one side of the liners and stick them on the back of the dartboard, press firmly for 30 seconds.
- Remove the liners on the other side of the strips and position the dartboard on the wall.
- Press the board firmly onto the wall for 30 seconds.
- Remove the board from the wall and press the strips on the wall for 30 seconds.
- Wait 1 hour before hanging the dartboard back on the wall.
| Pros | Cons |
| No nails required | Not super secure |
| Inexpensive | Only suitable for smooth surfaces |
| Easy to fit | Cannot rotate the board without re-installing the strips |

Command Large Picture Hanging Strip (image links to Amazon)
Option #4 Using a Portable Dartboard System or Stand
This doesn’t involve actually hanging the dartboard on the wall, but it’s a great option for position a dartboard pretty much anywhere without worrying about drilling. It’s also very handy if you want to take your dartboard with you anywhere other than your home, for example to a friend’s house for a party, or even on holiday.
The drawbacks are that they can be quite expensive, they aren’t as sturdy as using a wall, and they can take up a fair bit of space and make a room look a bit cluttered.
| Pros | Cons |
| No nails required | Expensive |
| Works anywhere | Not the sturdiest method |
| Allows you to rotate the board | Takes up more space |
Here are two examples with links to Amazon so you can check the current prices (images also link to Amazon).


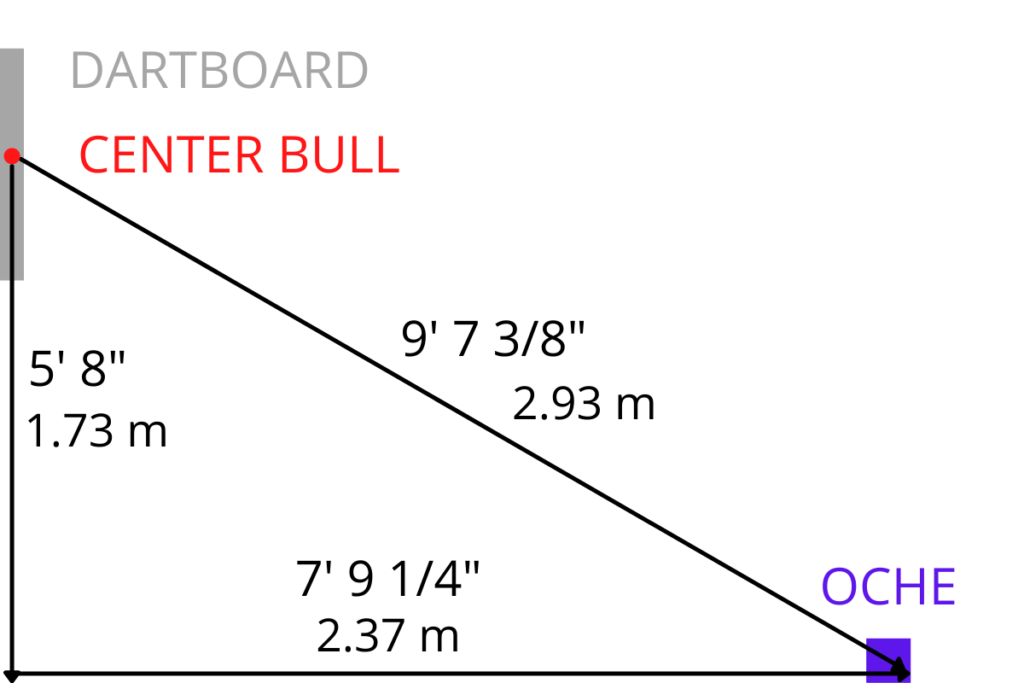
Measurements Needed for Hanging a Dartboard
The main measurement you need to consider when hanging a dartboard up, is the height. The official height of the dartboard is measured using the center bull (bullseye). The center bull must be 5’8″ (1.73 m) from the ground.
The second measurement to consider when playing darts is the oche, also known as the throw line. This varies for steel and soft tip darts:
- Oche with steel-tip darts: 7′ 9 1/4″ (2.37 m) from the center bull.
- Oche with soft-tip darts: 7′ 9 1/2″ (2.98 m) from the center bull.
Here is an example image for steel-tip darts.
Here are some more articles you might find useful: